Show how to tie a men's tie correctly. Tie knots: types
In the modern world, any man can choose a business suit and feel confident in any situation. But to make the look complete, you should know how to tie a tie in a simple way. Step-by-step photos will help you understand this.
A simple knot for beginners
Double knot
Another simple way to tie a tie, based on step-by-step photos:
- Place the tie with the seam facing inwards. Cross the two sides so that the wide part faces to the right. After this, use it to wrap the narrow end, keeping the coil intact. If everything is done correctly, the large tip will be located near the left hand.
- Slowly tighten the tie, but make sure that the narrow part is on top, and the wide part “goes” towards the right hand, forming a loop.
- We place a wide knot on top of it, and it turns to the left, passing through the gap in the neck area.
- We pull the larger side of the accessory into the eyelet and carefully tie it. Be sure to straighten the tie with your hands - this will help emphasize the double knot.

Quarter knot
An interesting idea for those who are tired of the “everyday” version of the knot. Repeating it is not so difficult if you follow all the recommendations:
- Place the tie around the neck so that the seam faces inward. The thin part should be on top, and the wide tip extends from the right side.
- After this, we take the wide part to the left hand and pass it through the loop formed on the neck. At the same time, we pull the tie to the top. All this time we hold the knot so as not to tighten it too much.
- All that remains is to tie the business accessory so that the wide side is closer to the collar of the shirt, and the narrow part can be pulled down a little.

Diagonal knot
The next simple way to tie a tie can be seen in the step-by-step photos. It is also recommended to read additional instructions:
- Place the tie around your neck so that the seam points inwards. After this, we place the wide part on top and form a crosshair.
- Now we pull the wide tip from below, move it closer to the right hand and wrap it around the narrow part once. As a result, the thin part should be on the right.
- We pull the larger side through the front side of the knot, throwing it through the loop on the neck. You need to bring it closer to your left hand.
- All that remains is to thread the tip into the formed eyelet and carefully tighten the tie.
Do you often wear ties?
Vote
Cross knot
This option looks very elegant and emphasizes a man’s good taste. Tying a knot requires a little practice, but all the effort is worth the results.
You just need to repeat a few steps:
- Place the tie with the seam facing inwards. We cover the wide side of the accessory with the thin part, and then move it closer to the right hand.
- Place the narrow side under the wide side to form a loop.
- We bring the larger end to the top, wrap it over the other side and carefully tighten it.

Hanover
A symmetrical knot will help create an interesting image and diversify your business look. Step-by-step instructions will help you do everything in the best possible way:
- Place the tie with the seam facing out. Afterwards, it needs to be crossed so that the seam of the wide part is also on the outside.
- We overlap it with the thin side and make sure that it extends closer to the right hand.
- We wrap the larger part at the smaller end and direct it to the right. We start the loop from the bottom up and pull the wide part down and then to the left.
- We make one circle near the knot, after which we carefully bring the large tip through the top loop near the neck.
- If done correctly, the wide side will curve around the base of the tie from left to right. Now we put it in the back on a loop near the neck so that it gets into the knot.

Kelvin knot
Tying a tie this way is very easy. In just a few minutes you can add some zest to your everyday look or slightly change your holiday outfit.

To do this you need:
- We put on the tie so that the seam is on the outside.
- We direct the thin part to the right hand so that it is on top. In this case, the seam should not change its location.
- Now we place the wide part on top, making a full circle. At the end, this side should be closer to the left hand.
- We place most of the tie over the knot one more time, but “lead” the fabric from left to right. Then we pass the end through the loop and through the formed eye.

Oriental
The easiest way to tie a tie, perfect for beginners. Step-by-step photos and additional instructions will tell you how to achieve a positive result:
- Place the tie around your neck and cross its sides so that the thin side is on top, looking to the right.
- We wrap the smaller part once with the wide side and make sure that it is closer to the left hand.
- We pull the large tip into the loop, pull it gently down and get a neat knot.

Onassis knot
In order to tie a tie in this way, you must repeat the following steps:
- We put the men's accessory on the neck so that its seam faces down. Place the wide part over the narrower side. It should be closer to the left hand.
- We place the larger tip under the thin side, and then point it up and pull it through the resulting loop on the neck.
- As soon as the ear appears, pull the same side down, tie a knot and give it a clearer outline.
- At the end, we move the wide part closer to the right hand, throwing it into the resulting knot. We straighten the tie again.

As you can see, there are several simple ways to tie a tie. For convenience, you can use step-by-step photographs or instructions with detailed videos.
Let's learn how to tie a tie correctly together right now - the instructions in the pictures will help. There are many ways to tie a tie from fabrics of different stiffnesses, with different shapes of the ends. Many people prefer to ask on the Internet: “how to tie a tie, step by step, photo, simple method,” and having found it, they quickly put it into practice. Let's look at several ways!
And also keep in mind the golden rule: large knots love collars with widely spaced corners. If you are planning a complex knot, let the tie fabric be soft; it can be easily molded. Now let's learn different methods and techniques. Let's look at the most popular of them.
Not decisive:
- textile,
- length,
- the shape of a shirt collar (the main thing is that the edges do not overlap the tie knot - large corners will not work).
Therefore, in fact, this option is called “free”. He really is the most unpretentious.
How to tie a children's tie with an elastic band - steps
- Starting position: the tie is placed loosely around the neck, at ease - ready to go.
- Please note: the wide end is on the left, and this is a prerequisite.
- Cross the two ends together for further actions.
- Make sure that of the two ends it is the narrow one that takes the place under the wide one, and the wide one - on the right.
- At this moment it needs to be given a left direction and pulled from the bottom side.
- You see, a loop has formed: this is where you need to place the wide end - so that it points upward.
- Let's drag it through.
- And here’s the result: we’re delaying it.
Try to select close-fitting collars and thin materials (fabrics). If everything is done correctly, the knot will be strict, although at the same time quite elegant. Guideline: at the end of all actions, the wide end of the tie should be located close to the trouser belt buckle. The entire sequence of how to tie a tie of this type is extremely clear, and you will soon see this. The main thing is to follow the step-by-step manipulations.

Simple steps on how to tie a tie with small knot tips
- Starting position: the tie around the neck lies loosely, the usual start of action.
- Observe the position of the wide end of the tie to the lower left (this is fundamentally important).
- We combine it with the narrow end according to the “crosswise” principle, do not rush, move on to the next points.
- Orient the wide end of the tie to the right.
- And let it go lower, where at this moment carefully drag it over the narrow one with the direction to the left.
- At this point, rotate it up and to the left.
- Now - from the bottom up, and only through the loop.
- Let's tighten up what we got. Perfect result!
Objectively speaking, these days this is the most widespread, popular model of tie knots. They are appropriate both daily and for celebrations. They look great with English-type collars (the corners are very wide in different directions). Let the following instructions help you on how to tie a tie of this type - it is accessible and understandable. You will definitely get everything right, regardless of the width of the product. Just change the relative position of both ends. This way you can change the density of the knot made and its size.

Steps on how to tie a Windsor tie correctly
- Starting position: The tie is placed around your neck, lying loose and relaxed.
- “Criss-cross” - combine both ends.
- The narrow one is definitely at the bottom.
- Now all attention is on the wide end - the main work will now begin with it.
- It’s important not to make a mistake here: we drag it from below, insert it into the loop, and then pull it to the left (see first figure, point 2, point 3).
- Next action: stretch it from top to bottom, but in reverse - with a slant to the right.
- We insert the wide end into the loop hole (try to do everything as shown in the first picture - step 6), pass it through the knot.
- The last movement is a gentle tightening.
- And now your knot is ready.
How to tie a tie correctly step by step, the easiest way - “half-Windsor”
If you want to be able to deftly, quickly and correctly tie a tie, the instructions will help you take error-free steps. The result should be a symmetrical, compact triangular knot - its volume is smaller than that of the Windsor system. The tie can be of any width, it doesn’t matter.

How to tie a tie correctly step by step, the easiest way - you ask, and we will answer - we give preference to fabrics: medium-heavy, from the silk series. Open collars are best, but any kind will do. At first, learn how to make an even knot in front of the mirror several times to quickly learn how to achieve symmetry. Watch how to tie a tie on video without fuss and haste, learn.
How to tie a tie using the half-windows method
- Starting position: neck, as usual, loosely tied with a tie.
- We cross its ends with each other.
- We place the narrow one under the wide one at the bottom (be sure to follow this condition).
- After which we drag it (the narrow end) tightly from below and direct it to the left.
- Raise it up.
- We let it into the formed loop.
- But that's not all - then we draw it over the narrow end to the left.
- After which - to the right side from the bottom side.
- We complete the procedure by pulling it through the loop from the inside to the outside, tightening it smoothly (moderate force).
- Surely you did it beautifully and evenly.
How to tie a tie step by step photo “double knot”
At the end of all the steps, you should have a compact knot in a men's tie - modern, comfortable, attractive. This design goes perfectly with long collars. Do you want to know in detail how to tie a tie according to such a current pattern? It is recommended to take into account: the length of the tie should be medium, the fabric should be soft.
How to tie a tie step by step
- Starting position: tie around the neck.
- Make sure that the wide end is strictly to the left and always lower.
- We combine the two ends in a cross pattern.
- However, this time it is wide at the top, on the right.
- We drag it under the narrow end. In this case, the direction is to the left.
- Then to the right, but from above.
- And again - to the left, this time from the bottom side.
- At this stage, we pass the wide end into the loop from the inside. Direction - follow from bottom to top.
- We pull it into the “ear”.
- Carefully straighten the fabric wherever necessary to ensure an even appearance.
- We tighten it - the goal is achieved.
Tie a tie step by step, photo, original “cross knot”
In this case, we are dealing with an elongated design - it is also called a “square” or “Italian” knot. It was originally conceived for men's ties with the same width at both ends (hence the name). Try to choose a tie that is not wide. By the way, high shirt collars are best. To figure out how to tie the tie in the photo, just carefully follow the step-by-step recommendations.
Steps:
- Initially, we place the tie on the neck - casually.
- Mandatory: narrow end to the right, wide end to the left.
- At the same time, let the narrow end be placed higher than the narrow end.
- Now we cross both ends mutually.
- An important point: place the wide one on the right, and on top.
- This is what we need to stretch to the left - this should be done under the narrow end.
- We direct from bottom to top through the left lobe of the nodal loop.
- We stretch it over the narrow end: to the right, then to the left. All this happens under the noose.
- Then pull the wide end in the middle of the loop through the “eye”.
- Carefully straighten the fabric in all places so that there are no distortions anywhere.
- We tighten it. There you have it, your knot is ready!
"Victorian Knot"
This option for tying a tie can be considered simple; it is very similar to the first option described above, but it looks richer and is suitable for ties made of thin materials. And you can wear it with office suits or shirts.
In some countries it is also called “four with an extra turn.”
- The first stage is the distribution of the length of the tie; in this version, the narrow side should be slightly shorter than the wide one. The wide end of the tie is draped over the narrow one.
- Next, the wide end should turn around the narrow end four times.
- Next, the wide side of the tie, which was making turns, is pushed into the resulting space between the collar.
- Next, the wide side is pulled out and laid on the narrow side.
- The knot is smoothed out well with your hands and pulled into the middle of the collar.
"Knot Oriental"
The Oriental knot can be considered one of the easiest to tie; this method takes only 4 steps. But it hides some pitfalls. For example, wearing it to events will be very inconvenient and impractical, since the knot is very weak and will need to be adjusted and tightened periodically. The knot option is suitable only for ties that are made of dense material, for example, wool, then the knot will hold tight and look decent.
- The very first difference when tying an Oriental knot is that the tie is draped around the neck with the wrong side.
- Next, the wide part of the tie from the bottom is thrown over the bottom and makes a girth of the narrow side.
- The wide part is pulled out through the resulting space in the middle of the collar.
- Carefully straighten the knot with your hands and tighten it.

"Balthus Knot"
This step-by-step option for tying a tie is classified as complex. It first became known about it in the 30s, from an artist from Switzerland whose name was Balthasar Klossowski. How to tie this type of knot on a tie will be described below with step-by-step instructions and photos. But there are some recommendations. In order for the knot to be neat, it is better to take a tie made of light and thin silk.
- The tie is put on the wrong side around the neck, and the narrow side is thrown over the wide one.
- Next, the wide end whips upward onto the narrow part.
- Next, the wide end is threaded into the neck ring and pulled out to the left.
- Then the same thing is done as in point 3, but with the other side.
- The wide part of the tie is threaded into the neck ring, as if sealing the two knots made. It should be extended to the left.
- Turn the wide end around the narrow end and thread it through the neck ring from behind.
- Next, insert the wide end into the formed girth from above and pull it out.
- It’s good to straighten out the knots and pull the tie towards your neck.

A beautifully tied tie will complete an elegant man's look.
"American Knot"
This simple method of tying a tie was first reported in the late 90s. But exactly who the author belongs to is still not known. In Europe, this version of the unit is called “Pratt”, and in the USA “Shelby”. This knot is only suitable for short ties with padding.
- The tie, as in the previous version, is put on under the collar with the wrong side up and the narrow end is thrown over the wide one and it should look to the right.
- Next, the wide end is threaded into the neck loop from top to bottom.
- A knot should form and should be tightened slightly.
- Pull the wide end in front of the knot to the right.
- And the last step is to thread the wide end into the neck loop from bottom to top and then into the resulting loop from top to bottom. Next, tighten the knot to the neck.
In order to choose the right tie for your shirt and suit, under no circumstances try it on yourself and do not evaluate the result in the mirror. Reviewing options should be done from the outside. To do this, place the shirt on a surface or hang it on a hanger and attach the tie to it, then the man will be able to correctly evaluate the combination of colors.
Designers advise a man to have a white shirt in his wardrobe; it’s like a little black dress for a woman, it’s universal. And it’s not difficult to choose a tie for a white shirt; you can take the first one that comes to hand.
To select colors and patterns for a shirt, you need to focus on only two basic rules:
- combine patterned fabric with plain fabric;
- fabric with a large pattern, combine with a small pattern.
If a man loves clothes with geometric shapes in the design, for example, stripes or checks, then only one main rule works here: they can be combined with each other only if they are of different widths. Well, you shouldn’t overdo it, any drawing, patterns, stripes and checks should be in a maximum of two things from the finished image. But there are always exceptions to the rules, so you can try to combine things that seem incompatible at first glance.
Did you know that not only women love to dress up, but also, for your information, men?! Yes, strange as it may sound, the strong half of humanity also strives to emphasize and somehow express their image with certain details, making it more perfect and elegant. In the pursuit of beauty and dazzling, all means are good. And this is not only an ironed and tastefully selected suit, a shirt, shoes polished to a mirror gloss, a hairstyle, a fashionable beard and eau de toilette, leaving behind notes of a fragrant, unforgettable trail. There is also some additional accessory that will properly emphasize your business style. This is, of course, a tie. Most men simply cannot imagine their life and even everyday life without this decoration. A business party, a trip to the cinema, New Year, March 8, February 23 and many other celebrations are unthinkable without this decorative nuance. However, not all men, unfortunately, are familiar with the technique of ideal and correct formation at home. You twist and turn, standing in front of the mirror for two hours, but nothing really works out, how can these pieces of shreds be harmoniously combined so that a masterpiece is born?! So that you don’t suffer for a long time, we provide our useful and informative article, which will show 10 options on how to properly tie a tie yourself without problems and pain. The prepared video with step-by-step master classes will consolidate your knowledge and test the acquired skills in your own practice.
Tie and its types
The word "tie" is translated from the German "halstuh" as "neck scarf". Subtle hints of its origins appeared in ancient China, but they did not in any way resemble today’s stylish accessory. For many years, this male attribute went through a series of transformations, something was added by world designers, something was removed, the length and width of this part varied, and as a result we have something that has become a real decoration and way of life for many men. And all this thanks to the American entrepreneur Jesse Langsdorf, who in 1924 patented the “classic tie”, consisting of three parts of fabric. The average length of this product is approximately 132 - 147 centimeters. There are, of course, other size options, but this is the most recognized and convenient.

Before we begin to study the most popular techniques for tying these accessories, I would like to note their existing types:
- classical(regular, windsor, regatta);
- ascot, plastron And Shar Pei(they are considered festive due to their inherent volume and extraordinary folds);
- butterfly(there are three subtypes of this element of a stylish image - self-knit, regatta and bow);
- bolo(in the form of a cord with an ornamental clip).
All of these options for ties presented by us differ from each other in their beauty and fashionability, they are prestigious, capable of arousing the admiration of women and the appraising glances of men gathered at various kinds of special events, they can complement any suit, emphasize a slender figure, hide flaws, express facial features and make them softer or stricter, lift your spirits, increase self-esteem and confidence in your superiority over others, and also diversify life in general. If you also want to add some zest to your wardrobe, follow our further advice. Add dramatic finishing touches with your choice of the coolest neck accessories and the most suitable techniques for tying them yourself.
Tying a tie with a simple knot

There are about 85 secrets of how to tie a tie yourself beautifully and quickly at home. But the most accessible and generally accepted is the classic type of knot - “Four - in - Hand”, which translates as “four in hand”. There are other names - “Quarter Knot”, “Italian Knot”, “Four Knot”, “Four Knot”. Every man can easily and simply do it without anyone’s help if he pays a little attention to our presented video with a step-by-step master class. As you can see in the photo, as a result of the process, the shape of the knot is small and neat in the form of a kind of cone, tapering downwards. This core configuration is universal. It goes with any suit and shirt. It will be accessible and accessible to beginners.
Tying a tie with a Windsor knot

This type of knot, named after the Duke of Windsor, is most suitable for everyday life. It is very comfortable to wear, since this decoration, made of thick or silky fabric, does not squeeze or restrict neck movements at all, and allows you to periodically loosen or tighten the tie ring, as needed. If you suddenly decide to remove this accessory, you will not need to completely untie it and then tie it again. This option can be selected for those men whose everyday life is spent in a hurry and endless turmoil, and they have no time to tinker with all sorts of intricate knots and twists. If you have decided on this most suitable option, then it is worth noting that the length of this decoration should be 4 centimeters longer than the standard size of the decorative product.
Tying a tie with a half-Windsor knot

In its structure, the half-Windsor knot is a little similar to its fellow Windsor knot, but it attracts the attention of many British gentlemen because the core of this product, as a result of a little effort, is obtained in the shape of a neat and elegant even triangle. It does not look massive and voluminous, a little larger than a simple knot, but smaller and more impressive than its Windsor relative. Ideal for shirts with classic or open collars.
Tying a tie with a Victorian knot

This version of the knot is also commonly called a “four” due to the fact that in the technique of tying a tie, there are additional entwinements of the core of the product with one of the ends of the fabric four times, and then it is tucked inside. Thanks to such actions, the knot turns out to be quite wide and oblique, but this does not prevent fans of beauty and elegance from using this creation in everyday life or at business events. Such a decorative item will evoke the most deserved glances of admiration from women and unprecedented interest from men. Always be on top!
Tying a tie with a Trinity knot

The “Trinity” knot of extraordinary beauty appeared not so long ago, but has already won many admirers among men. In its appearance, the core of the product is somewhat reminiscent of the Celtic symbol triquevert. The strangeness and originality of this decorative work amazes everyone so much that interests grow every minute. Every self-respecting gentleman strives to reveal the existing secrets of this type of knot. For those who want to build something similar from the very beginning, it’s worth slowing down a little and learning by listening to the video instructions below. Only after careful preparation will you be “born” with a slightly asymmetrical neck decoration, a bit like a Windsor handicraft. Without hesitation and without looking back in gnawing doubts, succumb to the fresh breath of fashion, and then you will be surrounded by curious gazes always and everywhere.
Tying a tie with an Eldridge knot

Among all existing units, Eldridge stands out for its unusualness, sophistication and brightness. For the emergence of this massive and extremely interesting “pattern in the form of an ear of wheat” we should be grateful to a simple American - inventor Jeffrey Eldridge, who, using his daily trial and error, invented this wonderful decoration not so long ago - in 2007. Since then, almost all gentlemen on the planet have been trying to master the art of tying a tie like this. A man with such a decorative design around his neck will win many of the best ratings and praises at any holiday. However, in order to learn such grace, you must first hone your skills on simpler versions of knots, and only then move on to something similar of this kind. Of course, if the desire is uncontrollably eager to learn this skillful art of weaving, then you should watch our prepared video tutorial and schematic master class. As you can see in the photo, this work is not easy; it is carried out through 15 stages of formation. The main share of labor in this technique falls on the narrow end of the tie, and not on the wide one, as in classical forms. As a result of numerous effective manipulations of one part of the product, a pattern that is ideal in nature gradually becomes clearer, which, to be honest, has a noticeable weight when worn. But fans of this creation turn a blind eye to this, and even to the fact that the knot, reproduced with incredible efforts, can easily come undone when removing the stylish accessory from the neck.
Tying a tie with a Cape knot

To learn how to tie a tie yourself with a “Cape” knot, as in the photo instructions we offered, you need to be mentally prepared for the fact that this method of design is not so easily accessible. In terms of the technique of execution, this “tie in a tie,” as it is also popularly called, is somewhat superficially similar to the Eldridge knot, but a little simpler. The course of action consists of 11 weaving steps, upon completion of which the resulting form of the product resembles at first glance two fabric elements of neck decor superimposed on each other, differing in width, and the miniature core of the creation seems to be packed in a separate “box” for more elegant looking. In general, all daredevils and those who like to experiment have had a wonderful opportunity to express themselves in the field of design art, and thereby attract as many curious glances as possible to their person at any party and in everyday life, as well.
Tying a bow tie

This version of the neck holiday decoration became widespread towards the end of the 19th century and to this day finds its fans not only among men, but also women and children. In everyday life, of course, it is not so often possible to meet people of the stronger sex with this kind of grace, but in theaters, at gala concerts, official events, under an excellent tuxedo or tailcoat, this detail, insignificant at first glance, will elevate everyone to unprecedented heights of honor and respect. In addition, this accessory, which elegantly complements a noble image, will not somehow constrain or limit your movements; it will not need to be endlessly adjusted when bending over, focusing on the center of the shirt. Small, strict, comfortable, it will leave you satisfied and confident under any circumstances. Now let’s all master the best and correct technique for tying it by delving into the video tutorial we prepared.
Tying a tie with an oriental knot

The oriental knot, or as it is also called “Oriental”, “Small tie knot”, “Asian tie knot”, is simple in its formation, but is more suitable for products made of hard, dense fabrics - woolen, knitted or some kind of wicker. The technique of creating decor is quite simple, it consists of just 6 steps, but beginners in this business need to practice a fair amount, since the slightest wrong movement can lead to your decorative creation coming loose in front of the public, which will not look particularly pleasant to the public. sides. When you feel confident in yourself and your abilities, after studying our step-by-step master class, create a small and very neat knot that will perfectly highlight your manly breasts at any opportune moment.
Tying a tie with a Pratt knot

Like many of its predecessors, the Pratt tie has additional names such as "American" and "Shelby." This masterpiece owes its name to US Chamber of Commerce employee Jerry Pratt, as well as the famous American reporter Shelby, who conducted his reports and broadcasts wearing this accessory. Since then, this version of neck decoration has become generally recognized and extremely popular among the male population. It is comfortable for everyday wear, and will not lose its elegant look on any holiday or weekend walks around the city with the family. It has the property of versatility, matching almost all shirts with narrow and wide collars. You can tie such an original knot on both standard and short ties, but under no circumstances on long ones, otherwise all your efforts will look most ridiculous.
The main rules: for complex knots, ties made of thin fabrics are used; for large knots, shirt collars should be with widely spread corners.
There are several ways to tie a tie:
1. Simple knot - very easy to tie. Sometimes also called "free". This knot is great for ties made of any material and any length. The collar of the shirt can be anything, the main thing is that the knot is not covered by the edges.
- Tie a face tie. Place the wide end of the tie on the left, below the narrow end
- Cross the ends of the tie, point the wide end to the right and pass over the narrow
- Pull the wide end of the tie to the left under the narrow end
- Pass the wide end of the tie through the loop from the bottom up from the inside
- Pass the wide end of the tie to the right over the narrow end
- Pull the wide end through the loop from the bottom up from the inside
- Pull the wide end into the eyelet
- Tighten the knot

2. A small knot is a very easy way to tie a tie. Suitable for ties made of thin fabric. The shirt collar should be tight fitting. The knot turns out elegant and strict. The wide ends of the tie should be level with the belt buckle.
- Place the tie on the wrong side around your neck. Place the wide end on the left, below the narrow end
- Cross the ends of the tie, pointing the wide end to the right under the narrow end
- Pull the wide end up and over the narrow end to the left
- Pass the wide end through the loop from bottom to top
- Tighten the knot

3. Windsor - difficult, but the most popular among knots. Suitable for ties of various widths. The desired size of the knot is achieved by changing the position of the narrow and wide ends of the tie. Suitable for English collar (corners wide apart)
- Pull the wide end under the narrow end, threading it through the loop
- Pull the wide end of the tie under the narrow one to the left (steps 2-3 in the first picture)
- Pull the wide end to the right over the narrow end
- Pass the wide end into the loop (item 6 in the first picture)
- Thread the wide end into a knot
- Tighten the knot


4. Half-Windsor - a symmetrical triangular knot. More compact, less bulky than the Windsor knot. Suitable for ties of any width made of medium-weight fabric (for example, thick silk). The shirt collar can be anything; it looks most harmonious with an open collar. At first, tie your tie in front of a mirror, this will make it easier for you to master this knot.
- Tie the tie right side around your neck
- Place the ends of the tie crosswise, with the wide end over the narrow
- Pull the wide end of the tie to the left under the narrow one
- Lift the wide end up, thread it through the loop and pull it to the left again
- Pass the wide end to the right over the narrow end
- Pull the wide end of the tie through the loop from the inside
- Thread the wide end of the tie into the knot
- Tighten the knot


5. Double knot - a compact knot. Great for long collar shirts. The tie should be made of soft fabric, not very short.
- Place the tie right side down on your neck. The wide end of the tie should be on the left, slightly below the narrow knot
- Pull the wide end of the tie under the narrow end to the left
- Pass the wide end of the tie into the loop from the inside from the bottom up
- Pull the wide end of the tie through the eyelet
- Straighten and tighten the knot

6. Cross knot (square, Italian) - an elongated knot. It got its name from the fact that the knot was originally tied on ties with two ends of equal width. It is also suitable for modern, narrow ties made of heavy materials (cashmere, wool). The shirt collar should be high.
- Place the tie right side out. The wide end of the tie should be on the left, slightly lower than the narrow end
- Cross the ends of the tie, the wide end on the right over the narrow
- Pull the wide end to the left under the narrow end
- Wrap the wide end of the tie through the left side of the loop from bottom to top
- Pull the wide end of the tie over the narrow end to the right
- Pull the wide end of the tie under the loop to the left, placing it in the middle of the loop
- Pull the wide end of the tie through the eyelet
- Straighten and tighten the knot

How to tie a tie in pictures
We'll show you several ways to tie a tie. In pictures
1. A simple knot is the easiest to tie. Suitable for those who are just learning to tie a tie.

2. Universal node. The most popular way to tie a tie. Suitable for silk ties of traditional width, wide thick ties and narrow ties that are becoming fashionable.

3. Elegant knot. Tie the same as the “universal” one, adding one more turn from the right corner of the collar. By using ties of different widths or changing the position of the narrow and wide ends of the tie, you can achieve the required size of the knot.

4. Another way to tie a tie. Ideal for high collar shirts. It is especially good for cashmere or wool ties from winter collections

All of the above methods of tying ties have been tested and are quite reliable.
How many ties do you need
Firstly, plain - the color that most suits all your suits. Keep in mind that a red tie is not only wonderfully refreshing, but is also considered a sign of success and power. A solid color tie can highlight a good color match between your suit and shirt.
Secondly, you can’t do without a tie with a repeating pattern. You can give preference to him, even when going to important negotiations. Of course, if the main component of the pattern is not a teddy bear or a naked beauty.
A striped tie speaks of serious intentions. A tie with a diagonal stripe in traditional color combinations will suit you only if you wear it under a plain suit and a shirt without a pattern.
A polka dot tie is even more versatile the smaller the diameter of the polka dots decorating it. Polka dots, which are more reminiscent of a dot, are quite suitable for formal events. Of course, the larger the peas, the more expressive the tie, but the greater the danger of looking like a clown.
A club tie will tell the whole world about your passions, in other words, about your hobby. Tiny guys waving golf clubs or tennis rackets, small yachts rushing through the waves, or airplanes cutting through the clouds will certainly be able to win over people with equally worthy hobbies.
Don't forget also that a bright tie is an advantage of youth. An elderly man can afford such decoration in the summer with a light suit somewhere at a fashionable resort.
You need a bow tie if you have a tuxedo in your wardrobe. In the classic version, the butterfly is black, but if you are confident in yourself, there is no limit to the variety of colors and patterns on it.
And finally, the most important thing. Every man's wardrobe must have a tie that most clearly reflects the individuality of its owner. This piece of fabric around the neck will truthfully tell everyone around: “This is what I really am.”
The end of the tie should reach the middle of the belt.
First of all, the color should be in harmony with the color of the suit, shirt, socks and shoes. Place the tie on your palm; if the wide end hangs freely without twisting, it will lie flat when you tie the knot. The seam on the back side should be sliding, not rigid - this is how handmade is defined. High quality ties are made from three different pieces, while most "commercial" ties are made from two.
The length of the tie should be such that when tied it covers the belt buckle. The width of the tie depends on the width of the jacket lapels. On average, they range from 7 to 9 cm. The knot should be tight; if you like, you can make a fold when leaving the knot.
In formal wear, the universal rule is a dark tie combined with a light shirt. And in general, dark ties look very elegant. But do not forget that it is better to choose a tie so that it is a tone lighter than the jacket.
The knot should always be made directly at the collar and not in the hands. The wide end should not end up too long or short; 2 cm below the waist is its optimal length. To do this, you need to pass the tie under the collar so that its narrow end is half the length of the wide one. Any knot must be tied carefully so as not to overtighten the fabric. At the same time, it should look tight, not loose.
A simple knot should be without folds. But the formation of a fold under a double Windsor knot is quite acceptable, but not necessary.
The choice of a particular node depends not only on fashion and your preferences. It is not difficult to guess that the material from which your tie is made also plays a significant role here. For example, the Windsor knot, which looks the most impressive, is completely unacceptable for ties with particularly dense lining fabric, since in this case it turns out to be too bulky, and the wide end is too short. The classic knot in this case will be ideal.
Few people know that the knot should be chosen depending on the type of collar. So, “Windsor” looks good only with cut-off collars, which is understandable. It is quite voluminous, and only the widely spaced corners of the cut collar will not puff up from it. And the classic type of knot looks good with any shape of collar because it is truly universal. No matter how thick or thin your tie is and no matter what your collar is, the result will always be excellent. The elongated shape of the knot visually lengthens the part of the neck above the collar, and the slightly diagonal line creates an interesting asymmetrical effect between the two ends of the tie.
For large men with a wide face and thick neck, wide knots (“Windsor”) are recommended.
The size of the knot is also dictated by fashion. The latest trend is large knots. The tie knot has shape and style.
In order to decide which knot to tie, first of all, you need to pay attention to the weight of the fabric, the width of the tie, the length of the tie, and the shape of the shirt collar.
How to choose the right tie
What does a man need to know when choosing a tie? First of all, the color should be in harmony with the color of the suit and shirt. Place the tie on your palm, grasping the narrow end of the tie, with the wide end hanging freely without twisting, it will lie flat when you tie the knot in the tie. The seam on the back of the tie should be sliding, not rigid - this is how handmade work and quality of tailoring are determined. High quality ties are made from three different pieces, while most "commercial" ties are made from two. The most expensive ties have a lining made of the same fabric as the tie itself.
The width of the tie depends on the width of the jacket lapels. On average, the width of a tie ranges from 7 to 9 cm. The knot should be tight; if you like, you can make a fold when leaving the knot. The length of the tie should be such that when tied it covers the belt buckle. You should be careful when choosing too bright ties with catchy designs, pictures or unfamiliar symbols. In formal wear, the universal rule is a dark tie combined with a light shirt. And in general, dark ties look very elegant. But do not forget that it is better to choose a tie so that it is a tone lighter than the jacket.
Ties are very popular in the following colors: blue, burgundy, yellow and grey. Large and small checkered patterns are very relevant. The most valued items are handmade silk ties made by Italian craftsmen. Synthetic fabric with a silk look or a mixture of it with silk looks good. There are ties made of fine wool, cashmere, cotton, linen and viscose. However, the latter quickly lose their appearance and shape.
How to preserve a tie and protect it from rapid wear and tear
In order for a tie to serve for a long time, it must not only be well looked after, but also stored correctly. When you remove a tie, the knot should be undone to prevent the fabric fibers from twisting. After this, it should be hung on a hanger so that it “hangs” for several days. A good quality tie does not need to be washed or ironed! A stain remover or dry cleaning can remove stains from a tie. Well, if you need to smooth out any wrinkles that have appeared, carefully roll up the tie and leave it like that overnight. By morning all the folds will straighten out. If you decide to iron it, remember that friction will fade the gloss and damage the fibers. After that, your tie will go straight to the trash bin.
When choosing a tie, remember that “one meets people by their clothes...”. A well-knotted tie paired with a suit and shirt is stylish and elegant.
About the history of the tie
A tie complements the image of a modern, successful man. Some representatives of the stronger sex consider it an excellent way to emphasize their individuality, while others, at the first opportunity, rip off the “hated noose” from their necks and shove it far away, while cursing its creators. But, be that as it may, everyone gives the tie its due, as evidenced by the history of its creation and use.
Even in ancient times, Roman legionnaires tied scarves around their necks to keep them warm. After the collapse of the Roman Empire, the fashion for neckerchiefs was adopted by the ancient tribes of modern Romania. From them she moved to Croatia, and then to Paris. The brilliant Louis XIV was crazy about everything beautiful and unusual, so he liked this innovation. This is how an ordinary neckerchief became an adornment of the French men's toilet. It was made from the finest fabrics and lace, and it was very difficult to knit.
Over time, the men's suit lost its pretentiousness, and men's attention switched to the tie - one of the few details with which one could show one's individuality. A whole science of tying a tie arose; textbooks were even written. In the seventies of the 19th century, ready-made factory ties appeared, and by the end of the century, clips for them appeared. However, the version of the tie that we see today arose only in the 20th century.
How to tie a tie in 15 seconds
This is useful to know not only for men, but also for their caring women.
The ability to tie a tie correctly is one of the most important skills in the arsenal of a real man and a caring wife. Today, there are dozens of ways to create knots, and each of them depends on personal preference. They all have one thing in common - they make men irresistible.
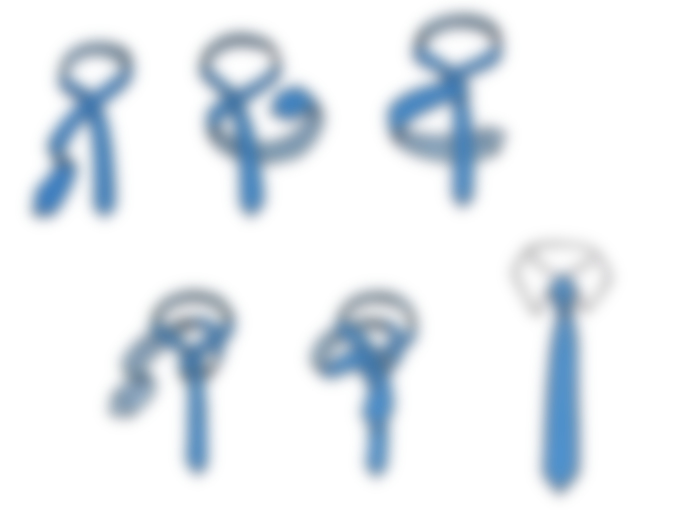
In this article Bright Side 7 of the simplest and most accessible options for tying a tie in the form of visual diagrams.
Simple knot
The simple knot, also known as the oriental or kent knot, is very easy to learn as it only requires a few steps. This knot looks good with thick ties and is suitable for tall men.
1. Unfold the wide end of the tie with the seam facing out.
2. Pass the wide end under the narrow one.
3. Then we put the wide end on it.
4. We insert the active end of the tie into the neck loop from below.
5. Pull the wide end into the eyelet formed after the 4th step.
6. Lower the wide end down to tighten the tie knot. We get a simple node.
To adjust the diameter of the neck loop, move the knot along the thin end.
Quarter knot
Named after the 19th century gentlemen's club "Four-in-Hand". In Russia it is better known as quarter. This is the current champion among ties. Its popularity is due to its simplicity and versatility.
1. We tie the tie around the neck so that the wide end is on the right and the thin end on the left, with the front side of the tie on top. When tying, use only the active (wide) end.
2. Cross the wide end with the narrow one, with the wide one above the narrow one.
3. Place the wide end of the tie under the narrow one.
4. Let's do it again.
5. We pass the wide end of the tie into the neck loop from the bottom up from the inside.
6. Pull the wide end into the loop formed from the wide end.
7. Lower the wide end down to tighten the tie knot, and the “four” is ready. Move the knot along the thin end to adjust the diameter of the neck loop.
Double knot
This is a compact unit. Great for long collar shirts. The tie should be made of soft fabric, not very short.
1. We tie the tie around the neck so that the wide end is on the left and the narrow end on the right. Place the narrow end slightly above the navel (the distance may vary depending on the height of the person, the length and thickness of the tie). When tying, use only the active (wide) end.
2. Cross the wide and narrow ends, the wide one should be located on top.
3. Pass the wide end under the narrow one.
4. Place the wide end over the narrow one.
5. The second time we pass the wide end under the narrow one.
6. Place the wide end on the loop formed around the narrow end.
7. We insert the active end of the tie into the neck loop from below.
8. Pull the wide end into both loops formed.
9. Pull the wide end down to tighten the tie knot. Move the knot along the thin end to adjust the diameter of the neck loop. In a double knot, the first (inner) loop should peek out slightly from below.
Windsor
1. The front side of the tie faces forward, the wide end is located on the right, the small end on the left. Only the active (wide) end moves.
2. Cross the wide and thin ends so that the wide one is located above the thin one.
3. We insert the active end of the tie into the neck loop from the bottom up.
4. We wrap it down in the same direction as after the 2nd step.
5. We guide the wide end under the narrow one.
6. Raise the wide end of the tie up.
7. We wrap it down, through the neck loop, in the same direction as after the 5th step.
8. Wrap the wide end over the narrow end.
9. We insert the active end of the tie into the neck loop from the bottom up.
10. We pass the wide end into the loop formed after the 9th step.
11. Carefully tighten the tie knot; if necessary, adjust the fold under the knot. Adjust the diameter of the neck loop by moving the knot along the thin end. The Windsor knot is ready!
The bow tie
1. Wrap the bow tie around your neck, right side up. Adjust the tie so that one end is longer than the other. Let's call one end “end A” (long), the other “end B” (short).
2. Cross the ends so that the long one is on top.
3. Pass end A into the neck loop.
4. Fold end B in half to form a bow and lay it across end A.
5. Lower end A down to the middle of the bow that was made in step 4.
6. Holding end B, fold end A right sides together, as shown in the diagram, and squeeze into a bend.
7. Pull the folded end A through the loop behind end B.
8. Take the bow by the two ends and pull in different directions to tighten the knot.
9. Adjust to achieve symmetry.
10. Your butterfly is ready!
Pratt
The inventor of the knot, Jerry Pratt, worked for the US Chamber of Commerce. For 30 years, Pratt tied his tie with his own unique knot before host Don Shelby "discovered" it and talked about it on local television in 1989.
1. The reverse side of the tie faces forward, the wide end is on the right, the small end is on the left. Only the active (wide) end moves.
2. Cross the wide and narrow ends so that the wide one is located under the narrow one.
3. Raise the wide end of the tie up.
4. Pass it down through the neck loop.
5. Place the wide end over the narrow end.
6. We insert the active end of the tie into the neck loop from the bottom up.
7. We pass the wide end into the loop formed after the 6th step.
8. Carefully tighten the tie knot. Adjust the diameter of the neck loop by moving the knot along the thin end.
Eldridge (complicated but effective)
"Eldridge" is a non-standard, complex and spectacular tie knot that is tied in 15 steps. It was invented by Jeffrey Eldridge in 2007 and quickly became popular. Unlike the vast majority of tie knots, the Eldridge knot is tied by moving the narrow end.
1. Place the tie around your neck with the right side facing out. The end of the wide end should rest above the belt buckle. When tying, move only the narrow end.
2. Cross the narrow and wide ends, while the narrow one should be located on top.
3. We wrap the narrow end to the other side, wrapping the wide end on the inside.
4. Raise the narrow end up above the neck loop.
5. We pass the narrow end through the neck loop from top to bottom and bring it to the opposite side of step No. 3.
6. Place the narrow end over the wide one and insert it into the neck loop from the bottom up.
7. We lower the narrow end that was raised up after the 6th step down to the opposite side and bring it behind the wide end on the opposite side. At this step we do not tighten the knot.
8. We wrap the narrow end to the other side and insert it into the loop formed after the 7th step.
9. Tighten the knot by pulling the narrow end to the side.
10. Pass the active end through the neck loop from top to bottom on one side.
11. Once again through the neck loop from top to bottom, with the narrow end on the reverse side. Don't tighten the knot.
12. We wrap the narrow end to the other side and insert it into the loop formed after the 11th step.
13. Pull the thin end to tighten the knot.
14. Hide the remaining part of the narrow end behind the neck loop.
15. The Eldridge unit is ready. Let others be jealous!